JAX 中的广义卷积#
![]()

JAX 提供了许多接口来计算跨数据的卷积,包括
对于基本的卷积操作,jax.numpy 和 jax.scipy 操作通常就足够了。如果您想进行更通用的批量多维卷积,应该从 jax.lax 函数开始。
基本一维卷积#
基本一维卷积由 jax.numpy.convolve() 实现,它为 numpy.convolve() 提供了 JAX 接口。这是一个通过卷积实现 1D 平滑的简单示例
import matplotlib.pyplot as plt

from jax import random
import jax.numpy as jnp
import numpy as np

key = random.key(1701)

x = jnp.linspace(0, 10, 500)
y = jnp.sin(x) + 0.2 * random.normal(key, shape=(500,))

window = jnp.ones(10) / 10
y_smooth = jnp.convolve(y, window, mode='same')

plt.plot(x, y, 'lightgray')
plt.plot(x, y_smooth, 'black');
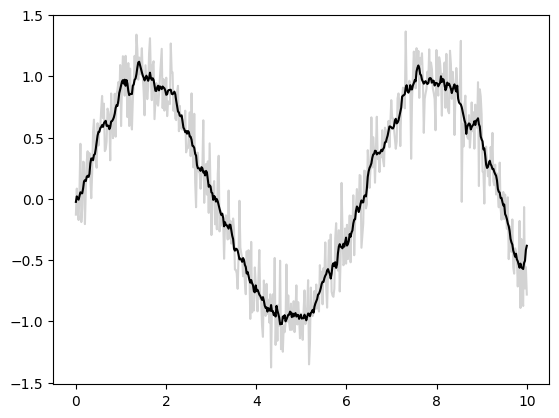
mode 参数控制如何处理边界条件;这里我们使用 mode='same' 来确保输出与输入大小相同。
更多信息,请参阅 jax.numpy.convolve() 文档,或与原始 numpy.convolve() 函数相关的文档。
基本 N 维卷积#
对于 N 维卷积,jax.scipy.signal.convolve() 提供了类似于 jax.numpy.convolve() 的接口,推广到 N 维。
例如,这是一个基于高斯滤波器卷积的简单图像去噪方法
from scipy import datasets
import jax.scipy as jsp

fig, ax = plt.subplots(1, 3, figsize=(12, 5))

# Load a sample image; compute mean() to convert from RGB to grayscale.
image = jnp.array(datasets.face().mean(-1))
ax[0].imshow(image, cmap='binary_r')
ax[0].set_title('original')

# Create a noisy version by adding random Gaussian noise
key = random.key(1701)
noisy_image = image + 50 * random.normal(key, image.shape)
ax[1].imshow(noisy_image, cmap='binary_r')
ax[1].set_title('noisy')

# Smooth the noisy image with a 2D Gaussian smoothing kernel.
x = jnp.linspace(-3, 3, 7)
window = jsp.stats.norm.pdf(x) * jsp.stats.norm.pdf(x[:, None])
smooth_image = jsp.signal.convolve(noisy_image, window, mode='same')
ax[2].imshow(smooth_image, cmap='binary_r')
ax[2].set_title('smoothed');
Downloading file 'face.dat' from 'https://raw.githubusercontent.com/scipy/dataset-face/main/face.dat' to '/home/docs/.cache/scipy-data'.
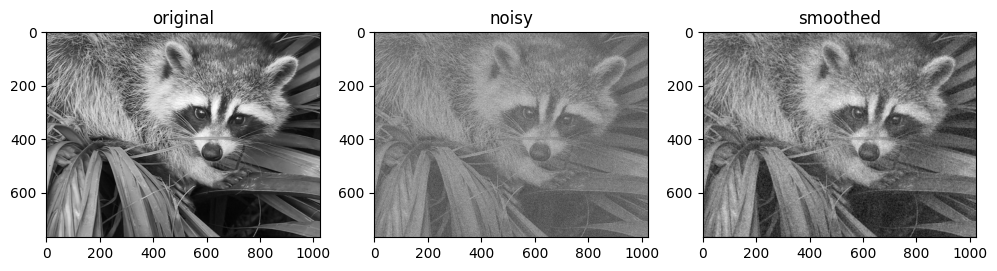
像在一维情况下一样,我们使用 mode='same' 来指定我们希望如何处理边缘。有关 N 维卷积中可用选项的更多信息,请参阅 jax.scipy.signal.convolve() 文档。
通用卷积#
对于在构建深度神经网络时通常更有用的更通用的批量卷积类型,JAX 和 XLA 提供了非常通用的 N 维 conv_general_dilated 函数,但如何使用它不是很明显。我们将给出一些常见用例的示例。
强烈推荐阅读对卷积算子系列的调查,卷积算术指南!
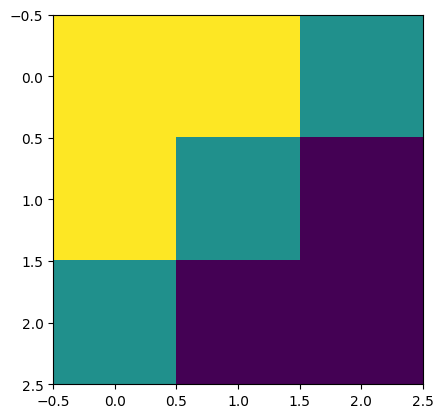
让我们定义一个简单的对角边缘核
# 2D kernel - HWIO layout
kernel = jnp.zeros((3, 3, 3, 3), dtype=jnp.float32)
kernel += jnp.array([[1, 1, 0],
                     [1, 0,-1],
                     [0,-1,-1]])[:, :, jnp.newaxis, jnp.newaxis]

print("Edge Conv kernel:")
plt.imshow(kernel[:, :, 0, 0]);
Edge Conv kernel:
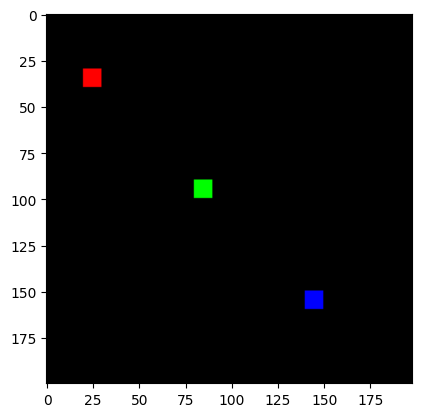
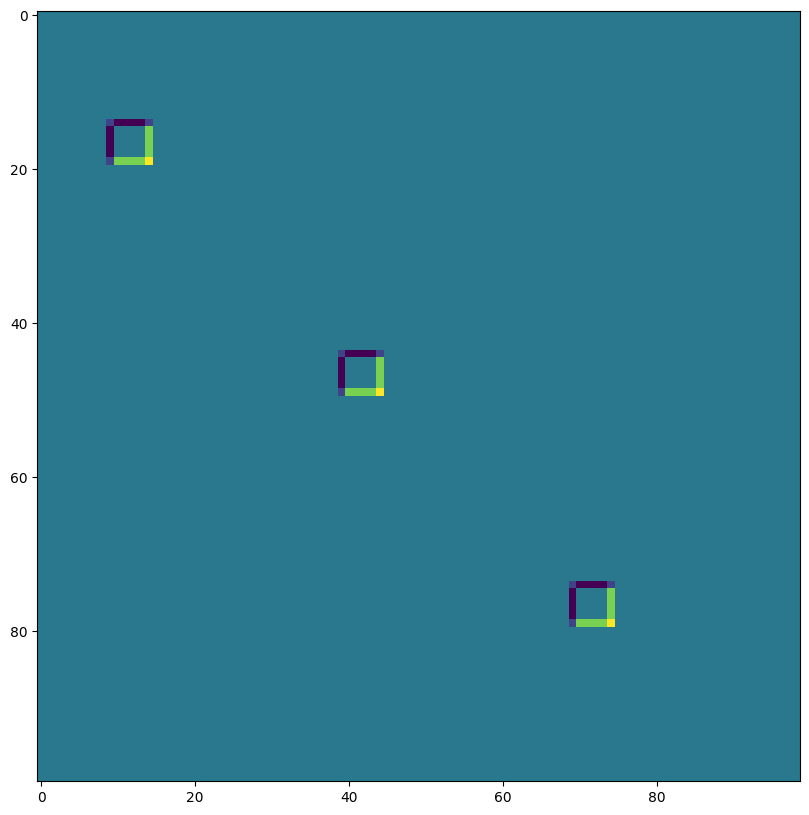
我们将制作一个简单的合成图像
# NHWC layout
img = jnp.zeros((1, 200, 198, 3), dtype=jnp.float32)
for k in range(3):
  x = 30 + 60*k
  y = 20 + 60*k
  img = img.at[0, x:x+10, y:y+10, k].set(1.0)

print("Original Image:")
plt.imshow(img[0]);
Original Image:
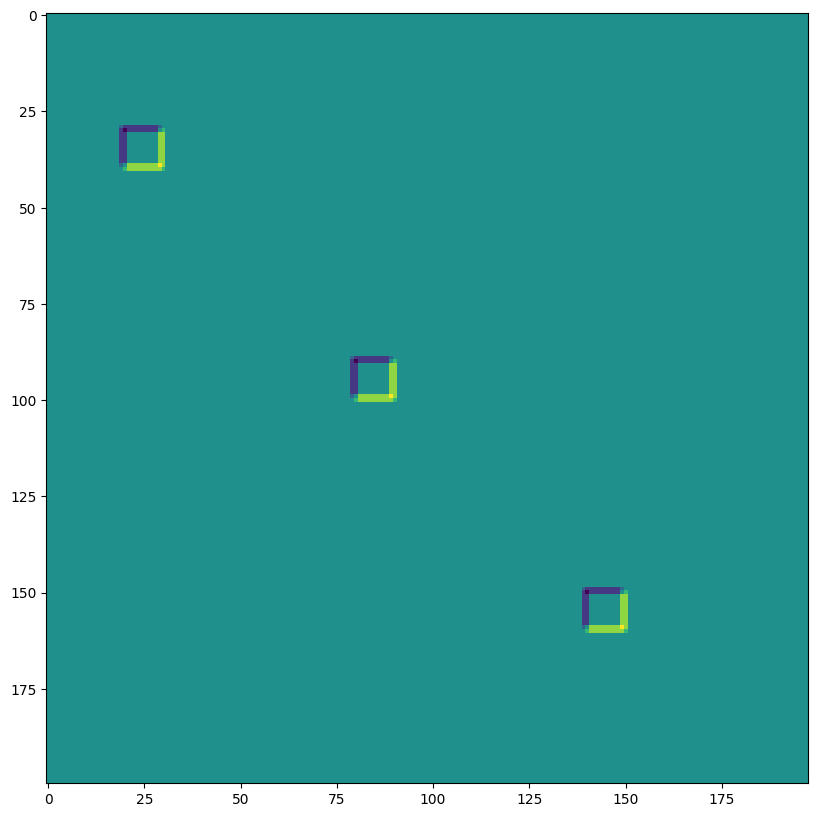
lax.conv 和 lax.conv_with_general_padding#
这些是卷积的简单便捷函数
⚠️ 便利函数 lax.conv,lax.conv_with_general_padding 假设 NCHW 图像和 OIHW 核。
from jax import lax
out = lax.conv(jnp.transpose(img,[0,3,1,2]),    # lhs = NCHW image tensor
               jnp.transpose(kernel,[3,2,0,1]), # rhs = OIHW conv kernel tensor
               (1, 1),  # window strides
               'SAME') # padding mode
print("out shape: ", out.shape)
print("First output channel:")
plt.figure(figsize=(10,10))
plt.imshow(np.array(out)[0,0,:,:]);
out shape:  (1, 3, 200, 198)
First output channel:
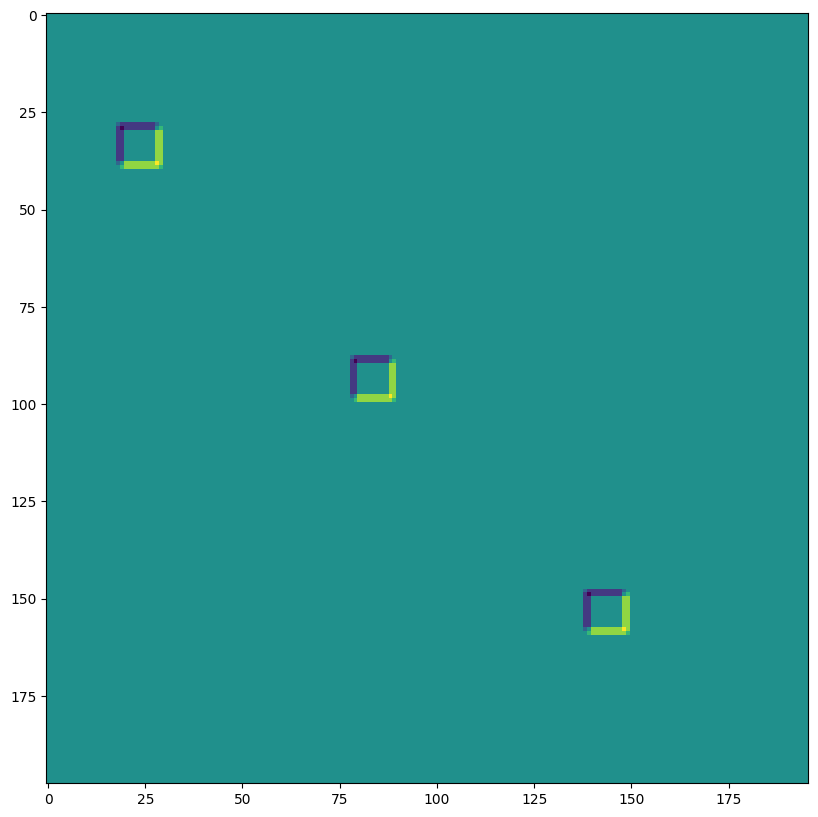
out = lax.conv_with_general_padding(
  jnp.transpose(img,[0,3,1,2]),    # lhs = NCHW image tensor
  jnp.transpose(kernel,[2,3,0,1]), # rhs = IOHW conv kernel tensor
  (1, 1),  # window strides
  ((2,2),(2,2)), # general padding 2x2
  (1,1),  # lhs/image dilation
  (1,1))  # rhs/kernel dilation
print("out shape: ", out.shape)
print("First output channel:")
plt.figure(figsize=(10,10))
plt.imshow(np.array(out)[0,0,:,:]);
out shape:  (1, 3, 202, 200)
First output channel:

维度编号定义 conv_general_dilated 的维度布局#
重要的参数是轴布局参数的 3 元组:(输入布局, 核布局, 输出布局)
N - 批次维度
H - 空间高度
W - 空间宽度
C - 通道维度
I - 核输入通道维度
O - 核输出通道维度
⚠️ 为了展示维度编号的灵活性,我们为下面的 lax.conv_general_dilated 选择一个 NHWC 图像和 HWIO 核约定。
dn = lax.conv_dimension_numbers(img.shape,     # only ndim matters, not shape
                                kernel.shape,  # only ndim matters, not shape
                                ('NHWC', 'HWIO', 'NHWC'))  # the important bit
print(dn)
ConvDimensionNumbers(lhs_spec=(0, 3, 1, 2), rhs_spec=(3, 2, 0, 1), out_spec=(0, 3, 1, 2))
SAME 填充,无步长,无空洞卷积#
out = lax.conv_general_dilated(img,    # lhs = image tensor
                               kernel, # rhs = conv kernel tensor
                               (1,1),  # window strides
                               'SAME', # padding mode
                               (1,1),  # lhs/image dilation
                               (1,1),  # rhs/kernel dilation
                               dn)     # dimension_numbers = lhs, rhs, out dimension permutation
print("out shape: ", out.shape)
print("First output channel:")
plt.figure(figsize=(10,10))
plt.imshow(np.array(out)[0,:,:,0]);
out shape:  (1, 200, 198, 3)
First output channel:
VALID 填充,无步长,无空洞卷积#
out = lax.conv_general_dilated(img,     # lhs = image tensor
                               kernel,  # rhs = conv kernel tensor
                               (1,1),   # window strides
                               'VALID', # padding mode
                               (1,1),   # lhs/image dilation
                               (1,1),   # rhs/kernel dilation
                               dn)      # dimension_numbers = lhs, rhs, out dimension permutation
print("out shape: ", out.shape, "DIFFERENT from above!")
print("First output channel:")
plt.figure(figsize=(10,10))
plt.imshow(np.array(out)[0,:,:,0]);
out shape:  (1, 198, 196, 3) DIFFERENT from above!
First output channel:
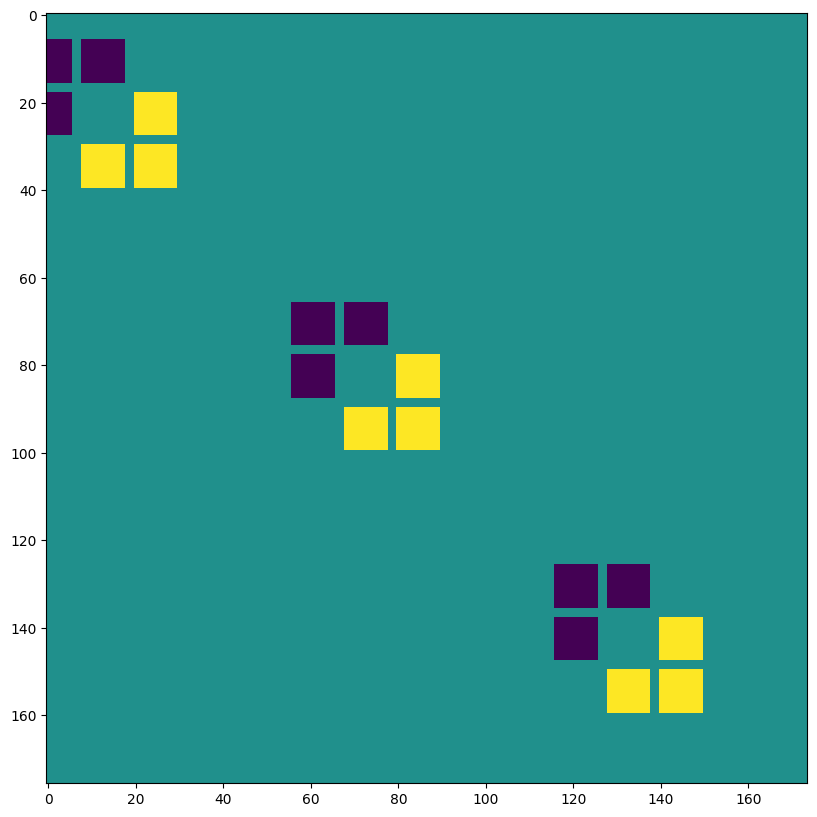
SAME 填充,2,2 步长,无空洞卷积#
out = lax.conv_general_dilated(img,    # lhs = image tensor
                               kernel, # rhs = conv kernel tensor
                               (2,2),  # window strides
                               'SAME', # padding mode
                               (1,1),  # lhs/image dilation
                               (1,1),  # rhs/kernel dilation
                               dn)     # dimension_numbers = lhs, rhs, out dimension permutation
print("out shape: ", out.shape, " <-- half the size of above")
plt.figure(figsize=(10,10))
print("First output channel:")
plt.imshow(np.array(out)[0,:,:,0]);
out shape:  (1, 100, 99, 3)  <-- half the size of above
First output channel:
VALID 填充,无步长,rhs 核空洞 ~ 空洞卷积(为了说明而过度夸张)#
out = lax.conv_general_dilated(img,     # lhs = image tensor
                               kernel,  # rhs = conv kernel tensor
                               (1,1),   # window strides
                               'VALID', # padding mode
                               (1,1),   # lhs/image dilation
                               (12,12), # rhs/kernel dilation
                               dn)      # dimension_numbers = lhs, rhs, out dimension permutation
print("out shape: ", out.shape)
plt.figure(figsize=(10,10))
print("First output channel:")
plt.imshow(np.array(out)[0,:,:,0]);
out shape:  (1, 176, 174, 3)
First output channel:
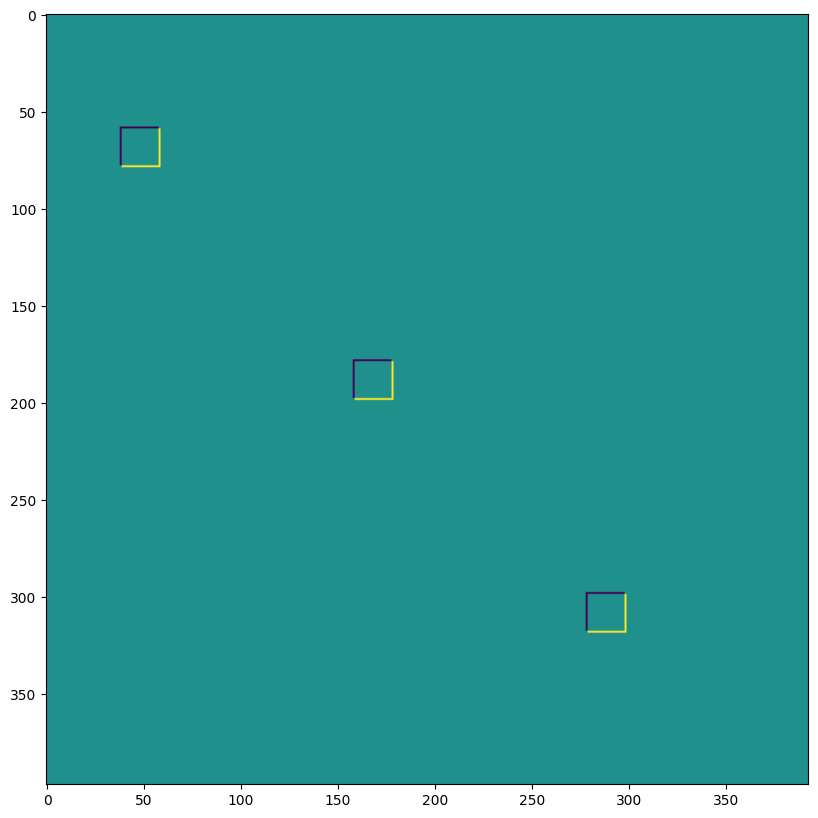
VALID 填充,无步长,lhs=输入空洞 ~ 转置卷积#
out = lax.conv_general_dilated(img,               # lhs = image tensor
                               kernel,            # rhs = conv kernel tensor
                               (1,1),             # window strides
                               ((0, 0), (0, 0)),  # padding mode
                               (2,2),             # lhs/image dilation
                               (1,1),             # rhs/kernel dilation
                               dn)                # dimension_numbers = lhs, rhs, out dimension permutation
print("out shape: ", out.shape, "<-- larger than original!")
plt.figure(figsize=(10,10))
print("First output channel:")
plt.imshow(np.array(out)[0,:,:,0]);
out shape:  (1, 397, 393, 3) <-- larger than original!
First output channel:
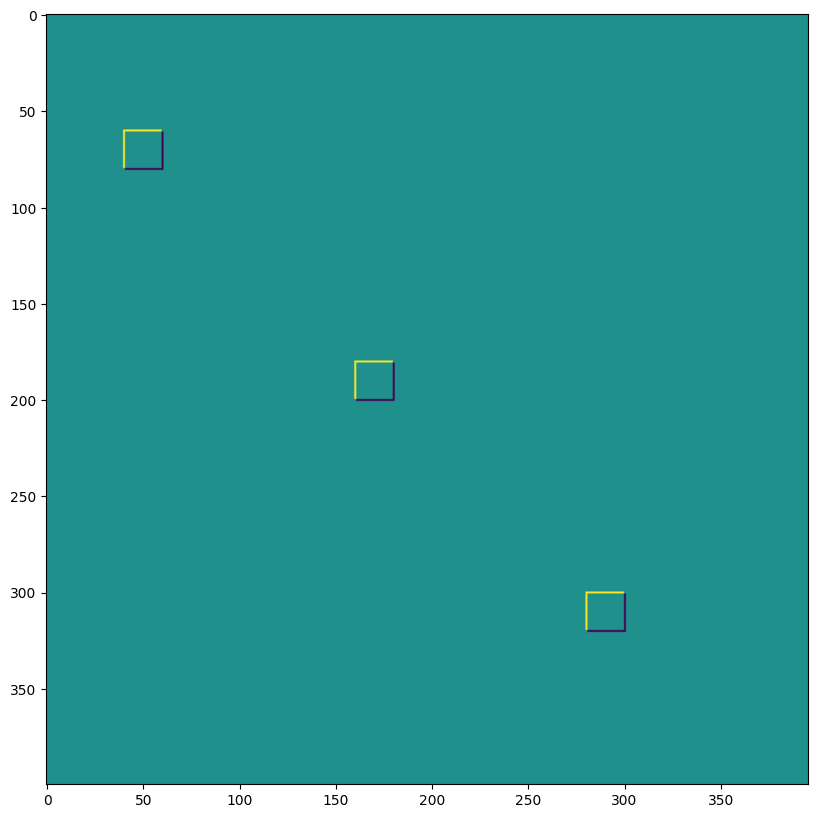
我们可以使用最后一个,例如,实现转置卷积
# The following is equivalent to tensorflow:
# N,H,W,C = img.shape
# out = tf.nn.conv2d_transpose(img, kernel, (N,2*H,2*W,C), (1,2,2,1))

# transposed conv = 180deg kernel rotation plus LHS dilation
# rotate kernel 180deg:
kernel_rot = jnp.rot90(jnp.rot90(kernel, axes=(0,1)), axes=(0,1))
# need a custom output padding:
padding = ((2, 1), (2, 1))
out = lax.conv_general_dilated(img,     # lhs = image tensor
                               kernel_rot,  # rhs = conv kernel tensor
                               (1,1),   # window strides
                               padding, # padding mode
                               (2,2),   # lhs/image dilation
                               (1,1),   # rhs/kernel dilation
                               dn)      # dimension_numbers = lhs, rhs, out dimension permutation
print("out shape: ", out.shape, "<-- transposed_conv")
plt.figure(figsize=(10,10))
print("First output channel:")
plt.imshow(np.array(out)[0,:,:,0]);
out shape:  (1, 400, 396, 3) <-- transposed_conv
First output channel:
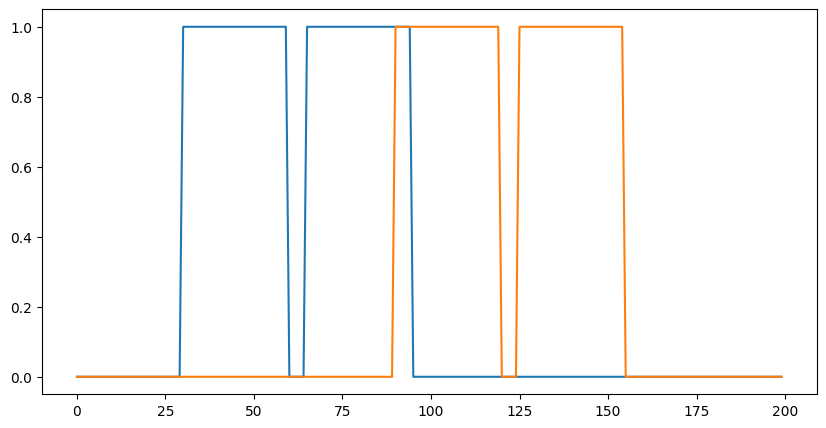
1D 卷积#
您不限于 2D 卷积,下面是一个简单的 1D 演示
# 1D kernel - WIO layout
kernel = jnp.array([[[1, 0, -1], [-1, 0, 1]],
[[1, 1, 1], [-1, -1, -1]]],
dtype=jnp.float32).transpose([2,1,0])
# 1D data - NWC layout
data = np.zeros((1, 200, 2), dtype=jnp.float32)
for i in range(2):
for k in range(2):
x = 35*i + 30 + 60*k
data[0, x:x+30, k] = 1.0
print("in shapes:", data.shape, kernel.shape)
plt.figure(figsize=(10,5))
plt.plot(data[0]);
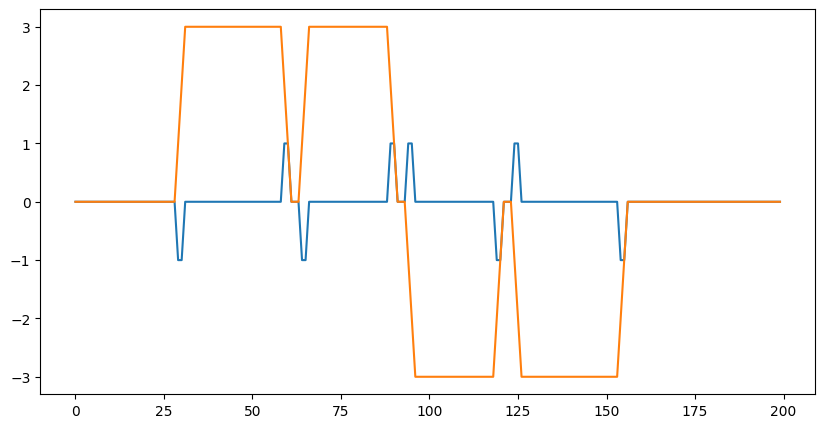
dn = lax.conv_dimension_numbers(data.shape, kernel.shape,
('NWC', 'WIO', 'NWC'))
print(dn)
out = lax.conv_general_dilated(data, # lhs = image tensor
kernel, # rhs = conv kernel tensor
(1,), # window strides
'SAME', # padding mode
(1,), # lhs/image dilation
(1,), # rhs/kernel dilation
dn) # dimension_numbers = lhs, rhs, out dimension permutation
print("out shape: ", out.shape)
plt.figure(figsize=(10,5))
plt.plot(out[0]);
in shapes: (1, 200, 2) (3, 2, 2)
ConvDimensionNumbers(lhs_spec=(0, 2, 1), rhs_spec=(2, 1, 0), out_spec=(0, 2, 1))
out shape:  (1, 200, 2)
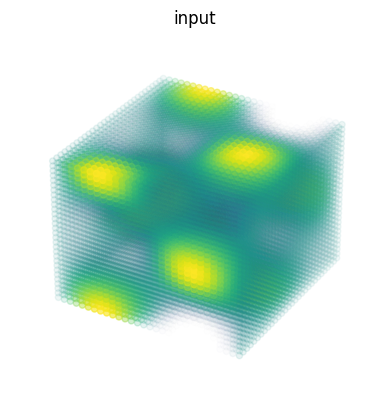
3D 卷积#
import matplotlib as mpl
# Random 3D kernel - HWDIO layout
kernel = jnp.array([
[[0, 0, 0], [0, 1, 0], [0, 0, 0]],
[[0, -1, 0], [-1, 0, -1], [0, -1, 0]],
[[0, 0, 0], [0, 1, 0], [0, 0, 0]]],
dtype=jnp.float32)[:, :, :, jnp.newaxis, jnp.newaxis]
# 3D data - NHWDC layout
data = jnp.zeros((1, 30, 30, 30, 1), dtype=jnp.float32)
x, y, z = np.mgrid[0:1:30j, 0:1:30j, 0:1:30j]
data += (jnp.sin(2*x*jnp.pi)*jnp.cos(2*y*jnp.pi)*jnp.cos(2*z*jnp.pi))[None,:,:,:,None]
print("in shapes:", data.shape, kernel.shape)
dn = lax.conv_dimension_numbers(data.shape, kernel.shape,
('NHWDC', 'HWDIO', 'NHWDC'))
print(dn)
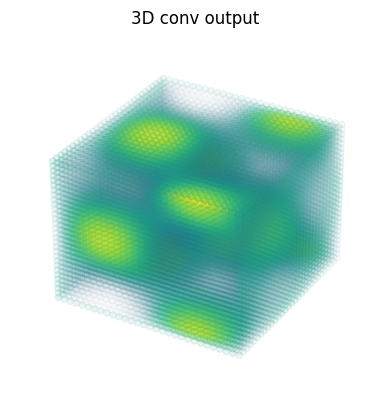
out = lax.conv_general_dilated(data, # lhs = image tensor
kernel, # rhs = conv kernel tensor
(1,1,1), # window strides
'SAME', # padding mode
(1,1,1), # lhs/image dilation
(1,1,1), # rhs/kernel dilation
dn) # dimension_numbers
print("out shape: ", out.shape)
# Make some simple 3d density plots:
def make_alpha(cmap):
my_cmap = cmap(jnp.arange(cmap.N))
my_cmap[:,-1] = jnp.linspace(0, 1, cmap.N)**3
return mpl.colors.ListedColormap(my_cmap)
my_cmap = make_alpha(plt.cm.viridis)
fig = plt.figure()
ax = fig.add_subplot(projection='3d')
ax.scatter(x.ravel(), y.ravel(), z.ravel(), c=data.ravel(), cmap=my_cmap)
ax.axis('off')
ax.set_title('input')
fig = plt.figure()
ax = fig.add_subplot(projection='3d')
ax.scatter(x.ravel(), y.ravel(), z.ravel(), c=out.ravel(), cmap=my_cmap)
ax.axis('off')
ax.set_title('3D conv output');
in shapes: (1, 30, 30, 30, 1) (3, 3, 3, 1, 1)
ConvDimensionNumbers(lhs_spec=(0, 4, 1, 2, 3), rhs_spec=(4, 3, 0, 1, 2), out_spec=(0, 4, 1, 2, 3))
out shape:  (1, 30, 30, 30, 1)